Showing posts with label baking. Show all posts

Rose Green Tea Cupcakes

Monday, September 26, 2011

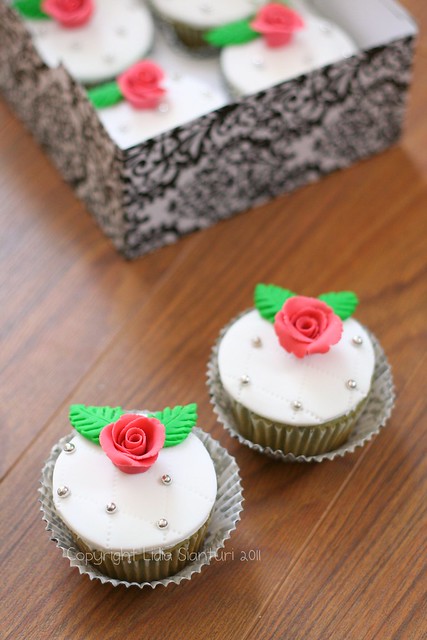
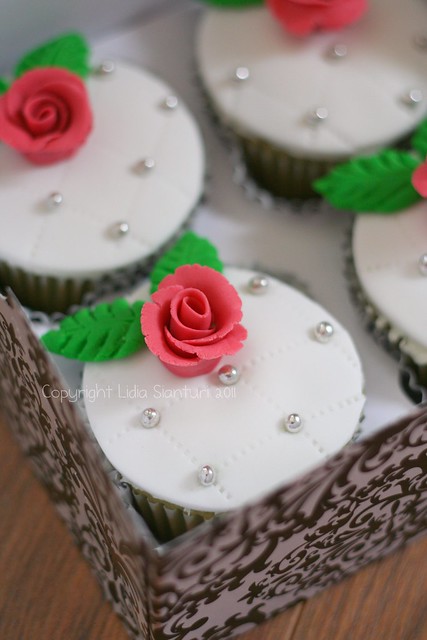
Rose Cupcakes

Lately, I prefer to cook or bake something for my friend's birthday or special event, rather than buying gift. Not that it is cheaper, it can be more costly, I feel that my hard work represents my love and caring for them. Just couple days before Jordan's birthday, my dear girlfriend had a birthday too. Thus I decided to bake some cupcakes for her. Since she is not a big fan of sweet, I prepared green tea flavored ones.
So the base is green tea cupcake, I was using the famous Hummingbird Red Velvet Cupcakes recipe and modify it with the addition of green tea and a drop of green food coloring, instead of cocoa and red food coloring.
Rose cupcakes

Ingredients for cupcakes:
60g unsalted butter, at room temperature
150g caster sugar (reduced to 125g)
1 egg
10g green tea powder
1 drop of green food coloring
1/2 tsp vanilla extract
120ml buttermilk
150g all purpose flour
1/2 tsp salt
1/2 tsp bicarbonate of soda
1.5 tsp white wine vinegar (I used regular vinegar)

For decoration:
1/2cup ready to use vanilla whipped cream
rolled fondant and gel food coloring
edible silver beads
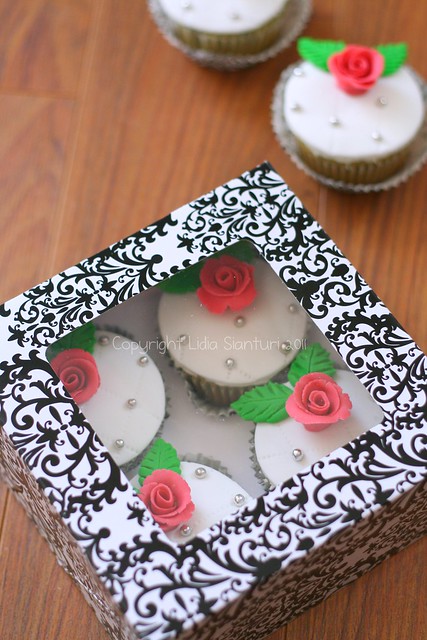
Rose cupcakes

Directions:
Preheat the oven to 325F. Beat the butter and sugar on medium speed until light and fluffy. Speed up the mixer and add the egg. Continue to beat until it is well incorporated. In a separate bowl, mix well green tea powder, green food coloring and vanilla extract to make a thick paste. Add this to the butter mixture and mix well. Scrape down the side of the bowl. Lower the speed and slowly add half of the buttermilk. Mix well, then add half of the flour. Mix well until it is incorporated. Repeat this process until all the buttermilk and flour are added. Scrape down the side of the bowl again. Turn up to the high speed and beat until smooth and even. Lower the speed and add salt, bicarbonate of soda and vinegar. Beat it again until well mixed, then turn up the speed again and beat for a couple more minutes. Spoon the mixture into the cupcake pan until two-thirds full and bake for 20-25mins. Cool them off.
Spread the ready-to-use vanilla whipped cream and let them sit on the counter for an hour or so until it is set. Continue to decorate using fondant and silver beads.
IMG_0936

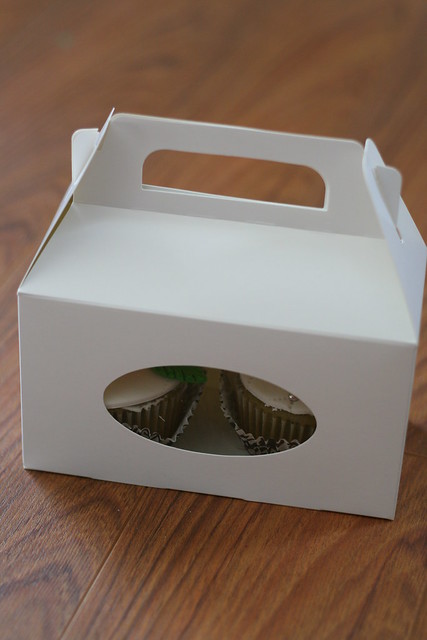
Since I got some cupcakes left, I packed two of them and gave them to Bianca's teachers.
Tutorials on how to make the rose and leave will be posted soon.

Princess Ariel Birthday Cake for My Beautiful Princess

Thursday, August 25, 2011


Front view - back focus

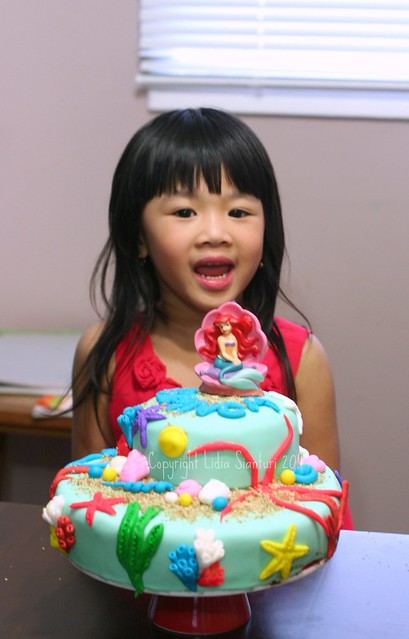
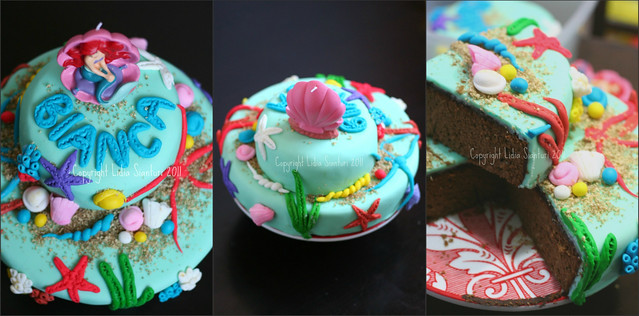
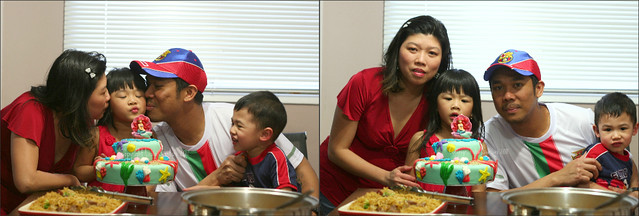
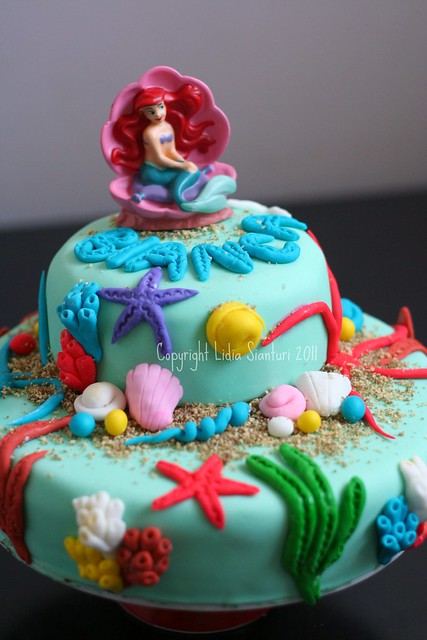
To make her kids happy is every mom's greatest desire. And that's my desire too to make my kids happy...super happy, especially on their birthday. It's been more than 3years I really wanted to make birthday cake for my own kids, well I have had that desire since Bianca was born. I envy people who have tons of activities, full time worker, yet still have time to make birthday cake for their owns. Thus last April, I put up together all my guts to make my very first fondant covered birthday cake for my Princess. She likes Princess Ariel, the Little Mermaid, so I decided to use "Under the Sea" theme. And here is the result...Look how happy she was!

Bianca's birthday

Ingredients:
Cake Base: I used 1.5x recipe of Lapis Surabaya cake (the economic version), but make it all chocolatey, no layer no filling.
A: (remember to multiply it by 1.5)
- 8 egg yolks
- 9 egg
- 300g fine granulated sugar
- 1 tsp vanilla essence
- 150g all purpose flour
- 1 tsp ovalet/emulsifier

B:
- 150g all purpose flour
- 25g corn starch

C:
- 250g melted margarine

D:
- 1 Tbsp rum
- 1 Tbsp chocolate paste

Decorations:
- Princess Ariel candle
- rolled fondant
- food grade gel coloring
- 2 pieces vanilla flavored wafers
- 2 Tbsp brown sugar
- chocolate ganache
- 2 bamboo skewers

B's birthday cake collage

Directions:

Mix and whisk A until fluffy. Add B and mix it under low speed. Add C and mix it well. Add D into it and mix it well. Pour the batter into greased 9inches and 6inches round cake pans. Bake at 175C for 35min until done. Cool it off. Spread the chocolate ganache on top and side. Cover with colored rolled fondant. Put the small cake on top of the big one, insert 2 bamboo skewers to hold the two cakes together. Decorate as you like.
For sand: mix brown sugar and wafers in a chopper, then sprinkle on the cake at the desired part.

Note: tutorial on how to make sea creatures will be posted soon.
B's birthday collage1

I also want to submit this post to Masak Bareng Yuuk (birthday edition). Happy birthday Masbar!


Black and White Wednesday - Week#6 - Banana Cake

Wednesday, August 17, 2011

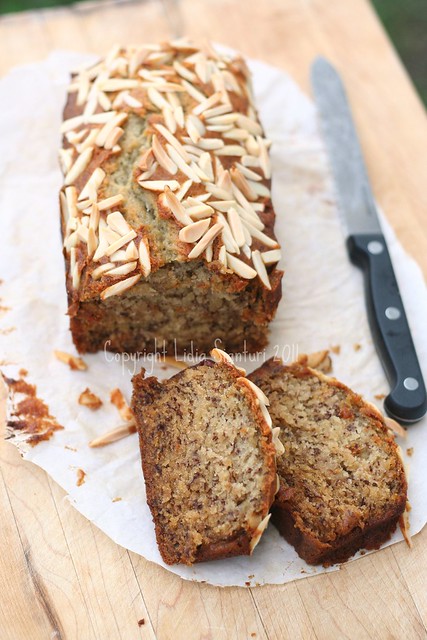
Banana Cake

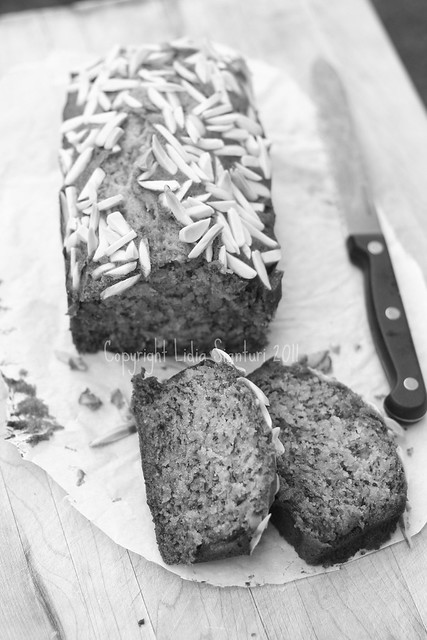
This is the first time for me joining this wonderful event called Black and White Wednesday hosted by Susan from The Well-Seasoned Cook. As for me the reason to join this event is because it is so challenging to make bw food picture looks appetizing. Hopefully by joining this event regularly, I will be able to shoot beautiful and drool worthy pictures. For my first entry, I presented a picture of banana cake. It was taken as colored picture, then edited into black and white using picnik. Later you may find the original colored picture.
This cake has been famous and become chit-chatting object among my Indonesian food blogger friends (we'd been talking and sharing the recipe over messaging group), mainly because it is so easy to make, no need to use mixer and the result is so yummy.


Ingredients:
- 3 0r 4 ripe bananas, mashed
- 1/3 cup melted butter
- 1 cup sugar (I reduced to 3/4cup)
- 1 egg, beaten
- 1tsp vanilla essence
- 1tsp baking soda
- pinch of salt
- 1.5 cups of all purpose flour
I added sliced almond for topping

Banana Cake

Directions:
Preheat the oven to 350F (175C). With a wooden spoon, mix butter into the mashed bananas in a large mixing bowl. Mix in sugar, egg, and vanilla. Sprinkle the baking soda and salt over the mixture and mix in. Add the flour last, mix well. Pour mixture into a greased 4x8 inch loaf pan. Sprinkle the sliced almond on top. Bake for an hour. Cool on a rack. Remove from pan and slice to serve.

Almond+Raisin Fermented Cassava Cake (Cake Tape)

Sunday, January 16, 2011

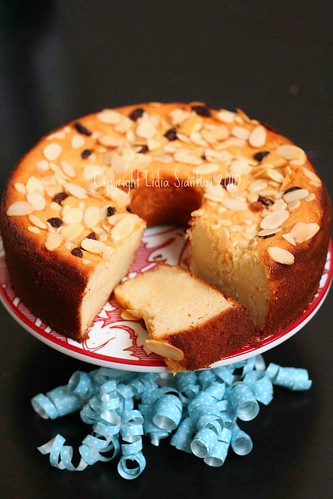
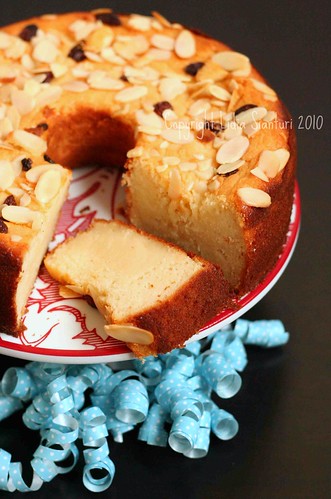
Cake Tape2

Do you notice that in a marriage, there is always complementary things? In my case, I love to keep foods in the fridge and husband love to take them out, either to eat or (mostly) to throw away. Sometimes I got irritated by him asking me, "do you still need this?"..."are you gonna eat this?"..."what's this for?"..."just cook this one or make that one"..
And the other day, I still kept this fermented cassava I made awhile before. When he opened the fridge he said, "is this still good?" So I feel the urge of making something with it. I remember, mom used to make this cake, but I've never learnt how to make it. Thus I browsed around the internet and found it here. The verdict: yummo, and sure won't be the last.

Ingredients:
- 250g butter
- 150g granulated sugar
- 1/2 tsp salt
- 300g fermented cassava, discard the rooty part in the centre
- 100mL coconut milk
- 6 eggs
- 180g all purpose flour, shifted
- 100g raisin
- 60g sliced almond

Cake Tape

Directions:
Mix the fermented cassava with coconut milk and then blend in a blender until smooth. Mix well butter, sugar and salt. Then add the cassava mixture into it and continue to beat with a mixer until smooth. Add 2 Tbsp flour and mix well and gradually add the eggs, keep mixing while doing it until the batter raised. Add the rest of the flour little by little while mixing it slowly. Then add raisin and mix well again. Pour into a greased angel food pan. Sprinkle the sliced almond on top. Bake at 370F until done (20-30min).


Peanut Butter Cookies - Christmas Count Down

Thursday, December 23, 2010

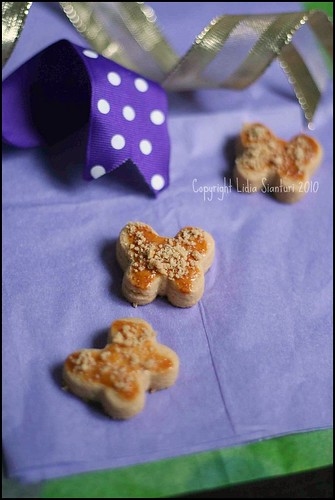
Peanut Butter Cookies

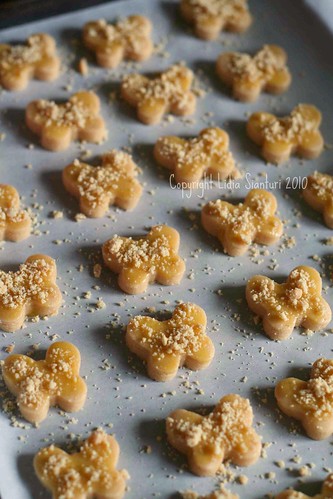
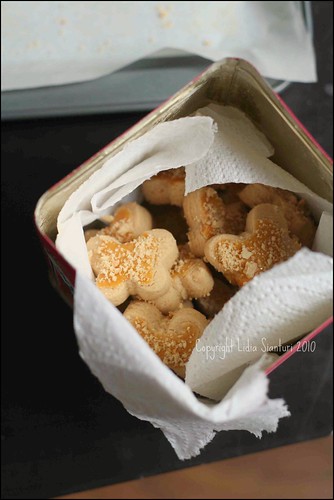
Don't you love failure-free baking? This cookie is one of them, you'll never fail to prepare it..and it tastes so good too. Let say it is also nice for gift basket goodies (for allergic-free family of course!).
And hey..it's 2nd day of Christmas...uh ah..(running around, packing and preparing for our trip tomorrow).

Read the original posting in Indonesian language here.

Ingredients:
-250g all purpose flour
-90g fine granulated sugar
-125g smooth peanut butter
-110mL vegetable oil
-1Tbsp milk powder
-½ tsp salt
-1Tbsp butter

For glazing+topping:
2 egg yolk,
briefly whisked
crushed peanut

IMG_7429

Directions:
Mix well sugar, peanut butter, oil, milk powder, salt and butter. Add flour and mix well. Flatten the dough with roller and cut with desired cookie cutter. Place them on a layered cookie tin. Glaze them with egg yolk and sprinkle some crushed peanuts on top. Bake at 150C until done.

IMG_7432

Green Tea Swiss Roll - Christmas Count Down

Tuesday, December 21, 2010

Green Tea Swiss Roll3

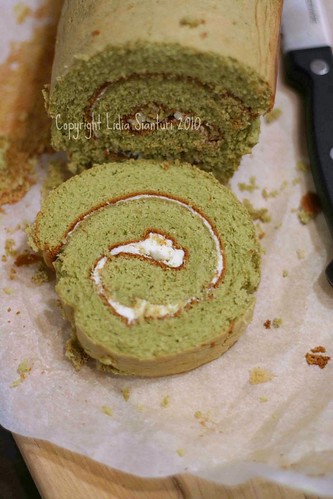
I have been crazy to every thing matcha (green tea)..yup...I have tried to bake matcha chiffon cake, to make matcha frappe, and last time I decided to make matcha swiss roll. I do not know why..maybe coz I feel it is somewhat healthy? Let's just believe it...:D

So on this 4th day before Christmas, I would like to share this recipe with you all! Got the recipe from here.
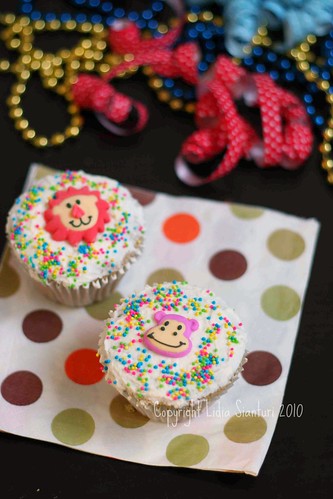
And since I have some left-over batter, I just made it as cupcakes. Had fun decorating it with kids as well...
I am not gonna type the recipe here, since I think it is better to read the original posting.
Next to try is: matcha truffles..stay tune!

IMG_8147

Duo-Trio Layers Cake (Lapis Surabaya) - The Economic Version!

Saturday, November 27, 2010

Lapis Surabaya

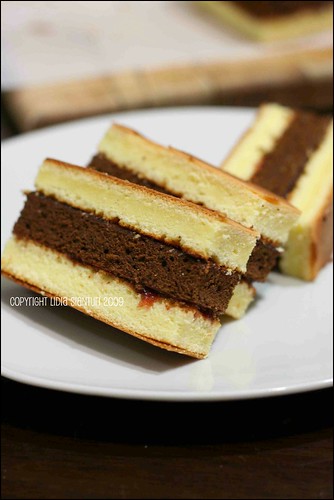
Some preggo crave for something during their pregnancy. Some are lucky enough to get what they wanted for. I was one of them. When pregnant with Bianca, 4years ago, I craved for this specific cake which require a lot of egg yolks, known as Lapis Surabaya. I do not know where it got its name from and why they pick Surabaya, a city in East Java to name it. Anyway, I got someone kind enough to make it for me at that time.
And when we moved to other town, I have no one to bake this cake, so I decided to try it on my own. But since, it was my first trial, I did not dare to use a lot of egg yolks, so I chose this economic version.
Oh, I got the recipe from here.

Ingredients:

A:
- 8 egg yolks
- 9 egg
- 300g fine granulated sugar
- 1 tsp vanilla essence
- 150g all purpose flour
- 1 tsp ovalet/emulsifier

B:
- 150g all purpose flour
- 25g corn starch

C:
- 250g melted margarine

D:
- 1/2 Tbsp rum
- 1 tsp chocolate paste

Filling
- strawberry jam

Lapis Surabaya2

Directions:

Mix and whisk A until fluffy. Add B and mix it under low speed. Add C and mix it well. Divide into 2 or 3 part (as you like, you may use just 2 layers or 3). Take one part and add D into it and mix it well. Pour the batter into 22x22cm cookie tin/tray which was lined with parchment paper before (you may use 2 0r 3 trays according to how many layer you like). Bake at 175C for 25min until done. Cool it off. Take one layer and spread the filling and arrange another layer on top of it. Cut edges to complete.


Cherry-Banana Crumbs Muffin

Thursday, July 29, 2010

Finally I come back with a recipe to share. Been very busy with the kids and home lately and missing blogging a lot. This time I would like to share a banana recipe together with some Indonesian foodie bloggers in the event of MASBAR. As some of you may know this is a monthly event, where we share our passion of cooking together, and each month we have a theme to accomplish.


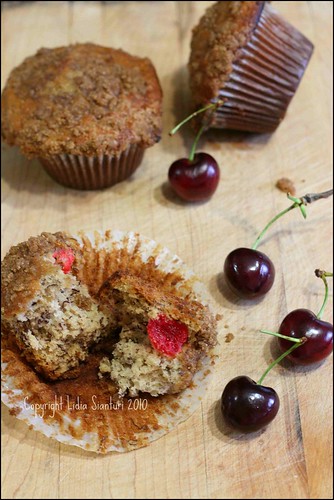
My husband loves these banana muffins, he can have them 3 in one go. I like the smell of cinnamon and the crunchiness of the crumbs. I got the recipe from here, and modified it by adding some cherries.

Here is the recipe:

Ingredients:

  • 1 1/2 cups all-purpose flour
  • 1 teaspoon baking soda
  • 1 teaspoon baking powder
  • 1/2 teaspoon salt
  • 3 bananas, mashed
  • 3/4 cup white sugar
  • 1 egg, lightly beaten
  • 1/3 cup butter, melted
  • 1/3 cup packed brown sugar
  • 2 tablespoons all-purpose flour
  • 1/8 teaspoon ground cinnamon
  • 1 tablespoon butter
  • 1 cup of half-cut maraschino cherries

Cherry-Banana Muffins with Cinnamon Crumbs3

Directions:
Preheat oven to 375 degrees F. Lightly grease muffin tins or line it with muffin papers. In a large bowl, mix together 1 1/2 cups flour, baking soda, baking powder, and salt. In another bowl, beat together bananas, sugar, egg and melted butter. Stir the banana mixture into the flour mixture just until moistened. Add the cherries and mix well. Spoon batter into prepared muffin cups. In a small bowl, mix together brown sugar, 2 Tbsp flour and cinnamon. Mix in 1 Tbsp butter until coarse cornmeal. Sprinkle topping over muffins. Bake for 18-20min, until a toothpick inserted into center of a muffin comes out clean.
Valentine's Cake - My Very First Cake Deco

Friday, February 19, 2010

Valentine's Cake

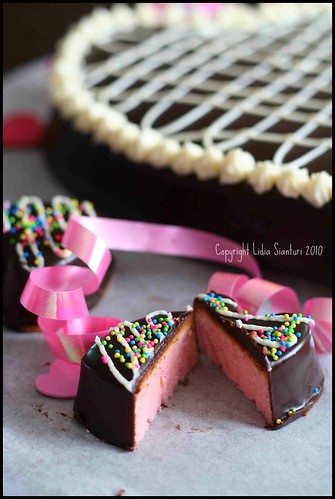
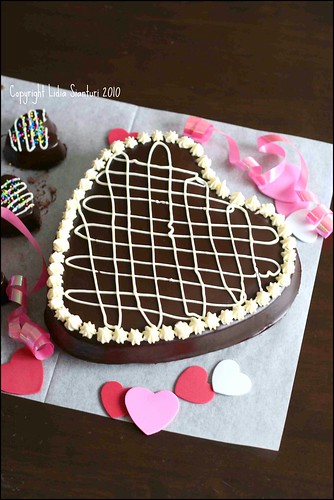
This year we did not do much for celebrating Valentine's Day due to our busy schedule. Not that we usually made it big no, well..at least we always had some fancy dinner on that day. My husband is attending school again and he had exam after the long weekend. Thus I only baked some cakes and for the first time ever, I decorated them using chocolate ganache, cream cheese frosting and some colourful sprinkles. Bianca loves the chocolate and sprinkles while Jordan loves the cake, so they share it. Still need a lot of practice and learn. So here is the cake recipe to share with you my beloved readers.

Valentine's Cake5

Strawberry Sponge Cake

Ingredients: (good for 1 medium size heart shape pan and 6 mini cupcake)
- 10 egg yolk
- 6 egg white
- 180g granulated sugar
- 200g all purpose flour
- 120gr soft margarine
- 1Tbsp of ovalette
- 1tsp of baking powder
- 4Tbsp of coconut milk
- 1tsp of strawberry paste
- 1tsp of vanilla essence

For decoration:
- chocolate ganache
- cream cheese frosting
- sprinkles

Valentine's Cake8

Directions:
Using a mixer, mix eggs, sugar and ovalette at medium high speed until fluffy and reaching good overrun. Add vanilla essence. Lower the speed of the mixer and add the flour and baking powder gradually. Add coconut milk and strawberry paste and continue to stir at low speed. Add soft margarine and stir it well. Preheat the oven at 370F. Pour the batter into a heart shape baking pan which was previously layered with margarine and flour, and pour the rest into a mini cupcake heart shape mould. Bake for 25-30minutes. Let it cool off.
Once it is cool enough, take it out of the pan, then pour the chocolate ganache over until all surface is covered. Keep it in a fridge until the ganache harden. Take it out and decorate it with some cream cheese frosting using cake decorating tips as preferred. At last add some sprinkles on the mini cupcakes.

Butter Cookies - My Childhood Fave

Wednesday, May 13, 2009

butter cookies

Back in my country, I used to have butter cookies which were sold in a can and came together with other cookies. The taste was so good and buttery of course and it melted in my mouth. Oh..I really wish I could find the same brand of it here. One day I visited a good friend of mine and she showed me a recipe book that got the recipe of butter cookies in it. I took a note of the ingredients and directions and practiced it in my kitchen. I modified half of the recipe with mocha essence. It turn out really good. So now, I can turn to my own kitchen when I feel like having this childhood favorite cookies.

Source: "Pandai Memasak Jilid 10", modified by me
Ingredients:
- 175 g butter
- 125g sugar
- 250g all purpose flour
- 2 egg yolk
- 1/2 tsp vanilla essence
- 1/2 tsp mocha essence (my modification)
- egg yolk+milk for glazing (my modification)

butter cookies2

Directions:
Beat butter, sugar and egg yolk with a mixer until smooth. Add flour and mix well. Divide it into 2, and add vanilla essence to one of it and mocha to the other, mix it well. Prepare a cookie sheet by greasing it with margarine. Then using a pipping bag, form the dough as rings, give space in between. Bake at 350F for 20-25minutes. Glaze the top surface with egg yolk and milk. Put it back to the oven and continue to bake for another 5minutes.

Raisin Cake - My Baking Adventure - Failure Series!

Thursday, April 2, 2009

raisin cake

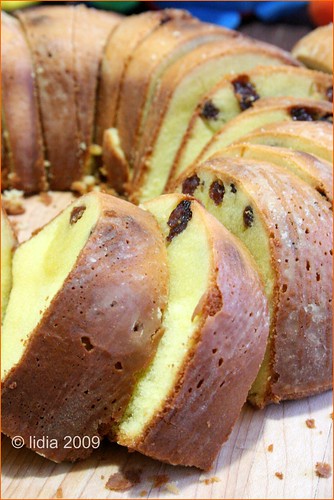
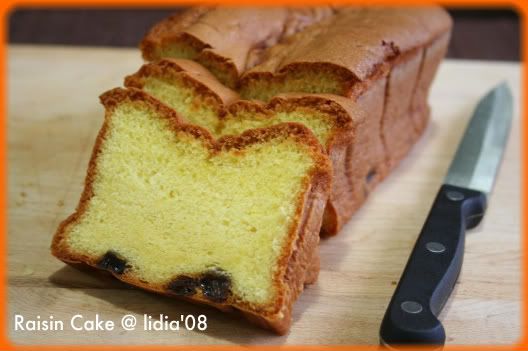
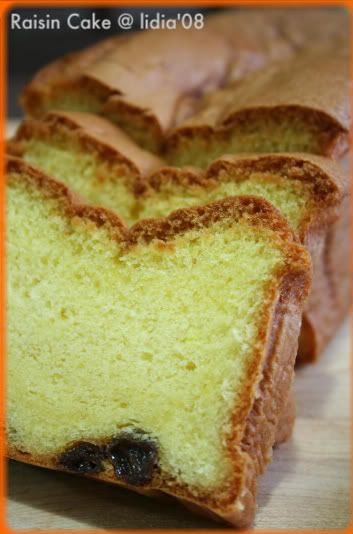
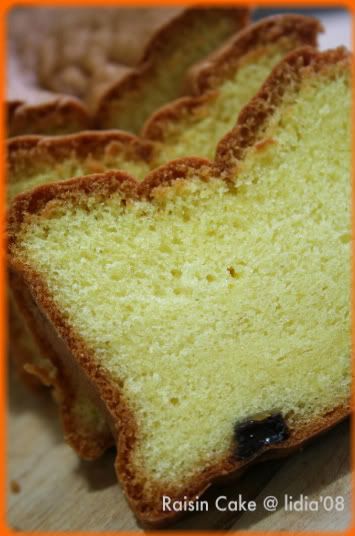
This happened when you were not patient enough to mix well the melted butter into the batter. I was so careless and just gave one-two strokes when mixing it. It was right after new year, and resolution did not give it any better! You can see the result, some butter "float" in the bottom of the cake mould (see the different color around the raisins, yup that is butter).
Second failure: some pores appeared...you are not supposed to be there "ugly" holes....your place is on ehmmm... Sponge Bob!
But still, the taste is yummy and still be my fave.
You can find the recipe here.

And today is Daddy's big day...Happy birthday Daddy! You absolutely are loved!

raisin cake2

PS: more failures coming up!

Japanese Cheese Cake - My Heaven on Earth Dessert

Wednesday, March 4, 2009

jcc2

I was literally drooling over the pictures I saw on Titi's page. And when I asked, she kindly sent the recipe to my mailbox, it was very nice of her. So one of those quiet evening, when my two kids were asleep and while waiting for my husband to get back from work, I made this yummy cake. It is definitely heaven on earth! Unfortunately I can not share the recipe publicly due to Ti's privacy. I hope you still can enjoy the pictures!

Note: drop her a line, you may be lucky enough to get the recipe sent to you...

jcc

Raisin Sponge Cake - A Friendship Recipe

Wednesday, February 18, 2009

Raisin Sponge Cake

I am thankful to have many great friends from blogging world. And with some of them I am even able to chat almost every day. And from what we are talking about, I have learnt a lot about many things. The other day, while chatting with Deetha and Rurie, I was dragged of the way they described this particular cake. They convinced me that this cake recipe is the best among its class. Thus, I tried it at my little kitchen and yes they are absolutely right. It is the best sponge cake I've ever made. It is super moist and soft. Now, I am happily presenting this sponge cake recipe and dedicating it for our friendships!

Yongki Gunawan's Sponge Cake (modified by me)

Ingredients:
- 10 egg yolk
- 5 egg white
- 10g emulsifier (I used 1tsp of ovalette)
- 150g sugar (I used 120g)
- 100g cake flour shifted (I used all purposed flour)
- 1Tbsp powdered milk (I used baby powdered milk)
- 1Tbsp cornstarch
- 150g butter
- 1Tbsp condensed milk (I used sweetened condensed milk)

I added:
- 1tsp of vanilla extract
- 2tsp of rhum
- raisin

Raisin Sponge Cake2

Directions:
Preheat oven to 180C, grease and flour a round or square cake tin. Melt butter in a saucepan. Whisk eggs and sugar until just thick and then add emulsifier and continue whisking until it is thick, white and fluffy. Add flour, cornstarch, powdered milk, sweetened condensed milk, vanilla extract and rhum and mix it well. Add melted butter and mix well again. Pour in the cake tin and sprinkle some raisin and bake for 25-30 minutes or until a tooth pick inserted comes out clean.

Raisin Cake To My Favorite...

Wednesday, November 19, 2008


Photobucket - Video and Image Hosting

Initially I wanted to make lapis surabaya, my forever favorite cake...However when browsing around the recipe on the internet, I found out it requires a big quantity of eggs and as a beginner in baking I do not dare to follow the recipe with a large amount of eggs. How if I fail? I do not want to waste the eggs that way..
So instead of making it layers, I just made it simple and added some raisin. This becomes my favorite...

Ingredients:
- 2 egg yolk
- 3 whole eggs
- 55g sugar
- 1tsp of ovalet
- 35g all purpose flour
- 15g of full cream milk powder (I used baby formula)
- 15g of corn starch
- 100 gr of melted margarine
- 1Tbsp of rhum
- 150gr of raisin

Photobucket - Video and Image Hosting

Directions:
Mix eggs and sugar with a mixer at high speed for 10minutes. Add ovalet and continue to mix until thick and fluffy. Add shifted flour, milk powder, corn starch and rhum, and mix it well with a spatula. Add melted margarine and mix it well again. Transfer it to a loaf tin which was layered with margarine and flour and then add the raisin. Bake at 350F for 40minutes.

Photobucket - Video and Image Hosting


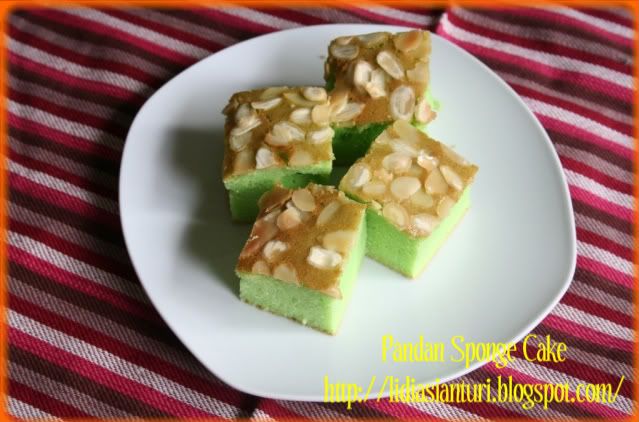
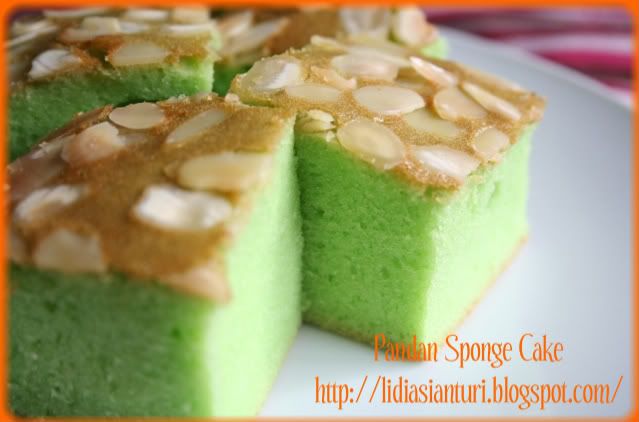
Pandan Sponge Cake

Saturday, September 6, 2008

Sponge Cake2

One of those nights, when I was waiting for my husband to get home from work, I felt like baking something simple. The choice went for pandan sponge cake. I copied the recipe from Shinta's Little Kitchen. But I did not make the custard cream filling, since I do not really into sweet. I made a bit of modification and added some sliced almond on top. Thank you Shinta for sharing the recipe....

Ingredients:
- 5 egg yolk
- 3 egg white
- 100gr granulated sugar
- 100gr all purpose flour
- 10gr baking powder
- 60gr soft margarine
- 2Tbsp of fresh milk (I replaced it with 2Tbsp of coconut milk)
- 1tsp of pandan paste
- 1tsp of vanilla essence
- sliced almond

Sponge Cake

Directions:
Using a mixer, mix eggs and sugar at medium high speed until fluffy and reaching good overrun. Add vanilla essence. Lower the speed of the mixer and add the flour and baking powder gradually. Add coconut milk and pandan paste and continue to stir at low speed. Add soft margarine and stir it well. Preheat the oven at 370F. Pour the dough into a 20 x 20 cm baking tin which was previously layered with margarine and flour, and then sprinkle some sliced almond on top. Bake for 25-30minutes.

Pandan Marble Cake

Wednesday, May 21, 2008

Photobucket

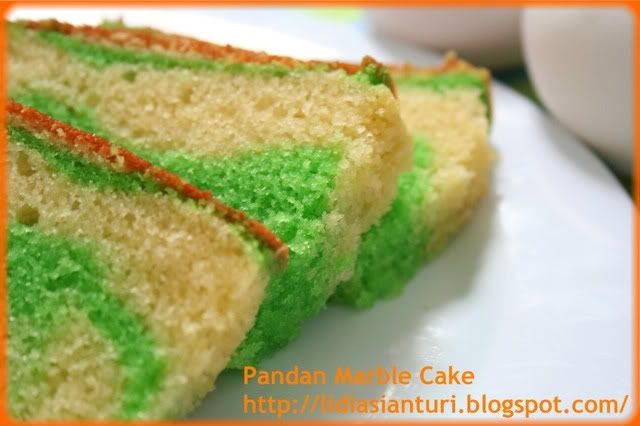
After the first trial and everything turned out good, I confess that am addicted to baking. And since I still have some self raising flour and eggs and all the stuff I need for making marble cake, two days ago I made this pandan marble cake for my friend's birthday. The taste was good but the texture was not as smooth as the first trial. I suspect, the cold egg made the difference. Next time I do making cake again, I better let the egg stands for awhile and reaches room temperature before mixing it with other ingredients.

Ingredients:
- 150gr margarine (leave it for awhile at room temperature)
- 75gr sugar
- 3 egg
- 50ml fresh milk
- 130gr self raising flour
- 1tsp of baking powder
- 3 drops of pandan essence
- 1/2 tsp of extract vanilla

Photobucket

In a mixing bowl, mix margarine and sugar under medium speed until smooth. Add the egg one by one while mixing and then add milk. Continue to mix for awhile. Add the vanilla and then flour and baking powder, continue to mix until you get a fluffy mixture. Divide the mixture into 3, add pandan essence to the one third of the mixture, stir it well with a spatula until color distributed evenly. Put it aside.
Prepare the loaf tin by greasing it with margarine. Pour the first one third of the yellowish mixture into the tin. Then the green pandan mixture and lastly the other one third of the yellowish mixture. Make a line movement from one side of the tin to the other end using a fork. Bake for 45minutes to 1h at 300F until done. Take it out of the oven and let it cool off, then cut into the desired thickness. Serve it with a cup of tea or coffee.

Marble Cake

Saturday, May 17, 2008


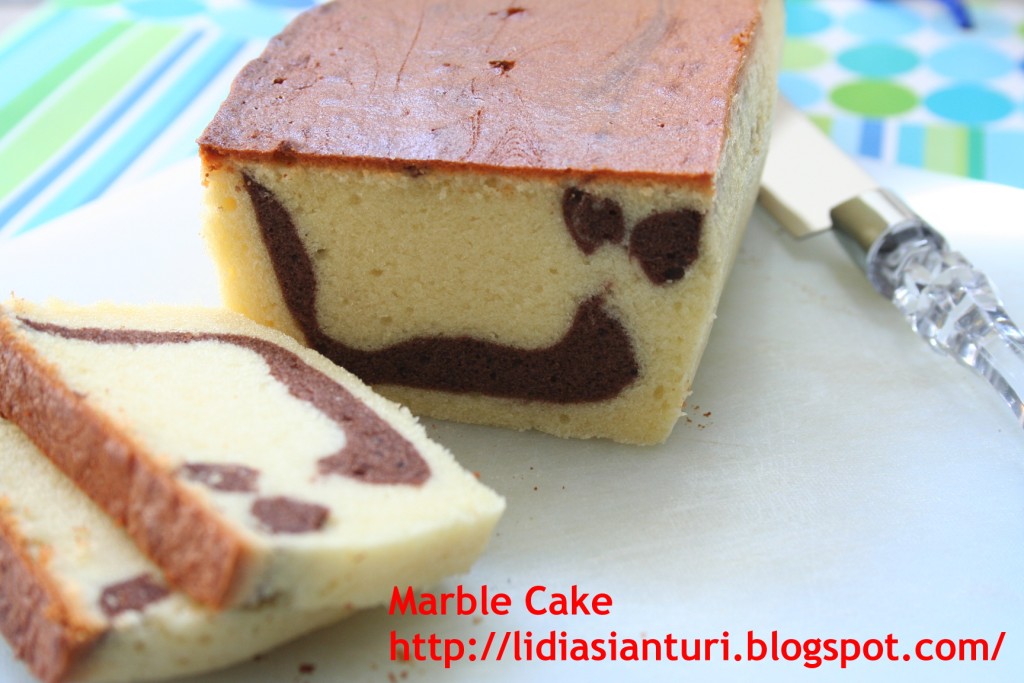
To be honest with you..this is my very first time doing baking from scratch myself. I'd never baked before, except when I was teaching food processing lab back in 2002-2003, but never in my own kitchen. On Friday I urged myself to start doing it, I wanted to make something delicious yet easy to make with a very little risk of failure. Melanie encouraged me to start doing it with this marble cake, she convinced me that I would never fail to follow this simple recipe. Beside I was also drooling when I saw the picture of it on her page.
Yes, finally I did it and she is right..I can do it! Thank you Mel...My husband loves the cake that he asked me to bake another loaf the next day.

Here is the recipe from her:

Ingredients:
- 150gr margarine (leave it for awhile at room temperature)
- 75gr sugar
- 3 egg
- 50ml fresh milk
- 130gr self raising flour
- 1tsp of baking powder
- 2 tsp of cocoa powder
- 1/2 tsp of extract vanilla


In a mixing bowl, mix margarine and sugar under medium speed until smooth. Add the egg one by one while mixing and then add milk. Continue to mix for awhile. Add the vanilla and then flour and baking powder, continue to mix until you get a fluffy mixture. Divide the mixture into 3, add cocoa powder to the one third of the mixture, stir it well with a spatula. Put it aside.
Prepare the loaf tin by greasing it with margarine. Pour the first one third of the yellowish mixture into the tin. Then the cocoa mixture and lastly the other one third of the yellowish mixture. Make a line movement from one side of the tin to the other end using a fork. Bake for 45minutes to 1h at 300F until done. Take it out of the oven and let it cool off, then cut into the desired thickness. Serve it with a cup of tea or coffee.

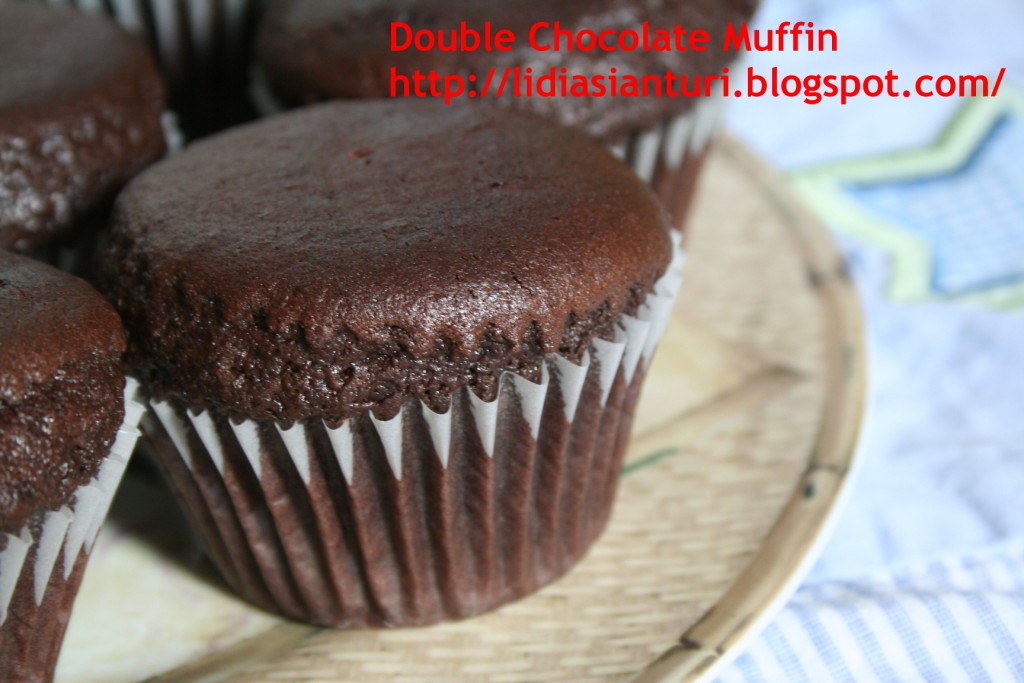
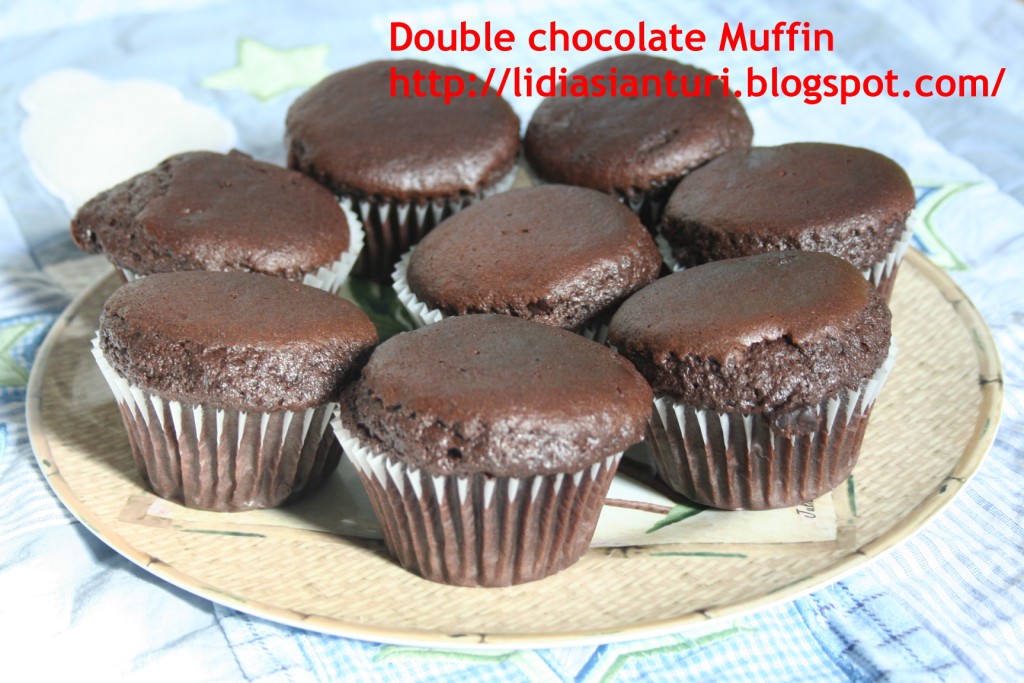
Double Chocolate Muffin

Monday, May 5, 2008


Last Friday evening, we had some church friends coming to our tiny apartment for Bible studying. I still had some throat infection and coughing, so my husband asked not to spend lot of time in the kitchen. First he said it is better to serve some green mung beans dessert, but when I tried to find the mung beans in our stock container, I could not find it there. So yeah..at the end I just prepared these muffins. No special recipe since it came in a ready-mixed package.

Ingredients:
- 1/2 package of Double Choc Muffin mix
- 2 eggs
- 2 Tbsp of margarine, melt it
- 165ml of milk (supposed to be just plain water, but I replaced it with milk)


Place the muffin mix in a bowl, add the margarine and egg and mix it well with a spatula. Add the milk little by little while stirring the dough with a spatula, until you get even-mixed muffin dough. Pour in a muffin tin, 2/3 way full. Prepare an oven by heating it at 350F for 10minutes. Bake the dough for 30minutes.

Note: the recipe is good to make 10-12 muffins.

Pizza for Brunch!

Sunday, April 20, 2008


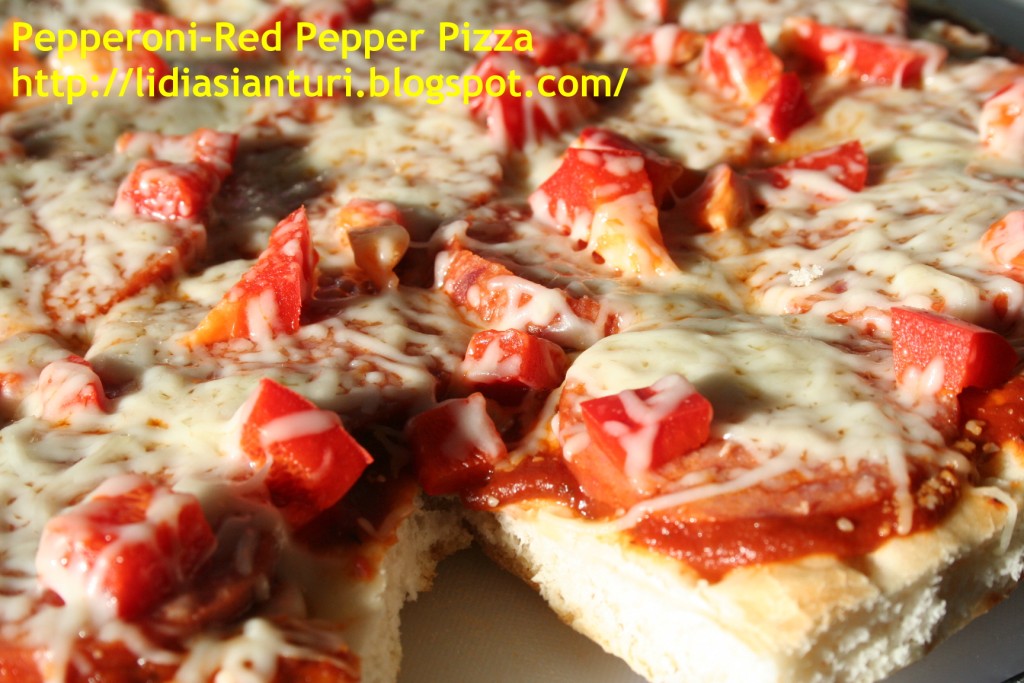
I have had this pizza base sitting in my freezer for more than a month. And since I was all by myself during the day (of course I was with my little Bianca..I mean my husband was not at home), I wanted to make pizza for my brunch. And I still have some pepperoni, red pepper and shredded cheese...so I was set to go! It's so easy, coz I just added the topping and then baked it and enjoyed the fresh warm pizza!

Ingredients:
- 1 pizza base
- 1 package of pizza sauce which came with the base
- pepperoni sausage, cut into thin slices
- red bell pepper, cut into small pieces
- shredded cheese (I used Italian mixed)


This time I did not use conventional oven, instead I used my electric skillet.
First, prepare the skillet by heating it up at 250F for 5minutes. Place the base on it and then spread the sauce evenly. Add whatever topping you prefer (for me this time is pepperoni and red pepper). And at last sprinkle shredded cheese on top.
Put on the lid and baked for 8minutes or until the cheese melted.

Note: by using this electric skillet, it reduces the cooking time significantly. Thus it reduces the energy consumed. Moreover the result is crunchier than the one I baked in a conventional oven.

Blueberry Muffin

Wednesday, April 9, 2008


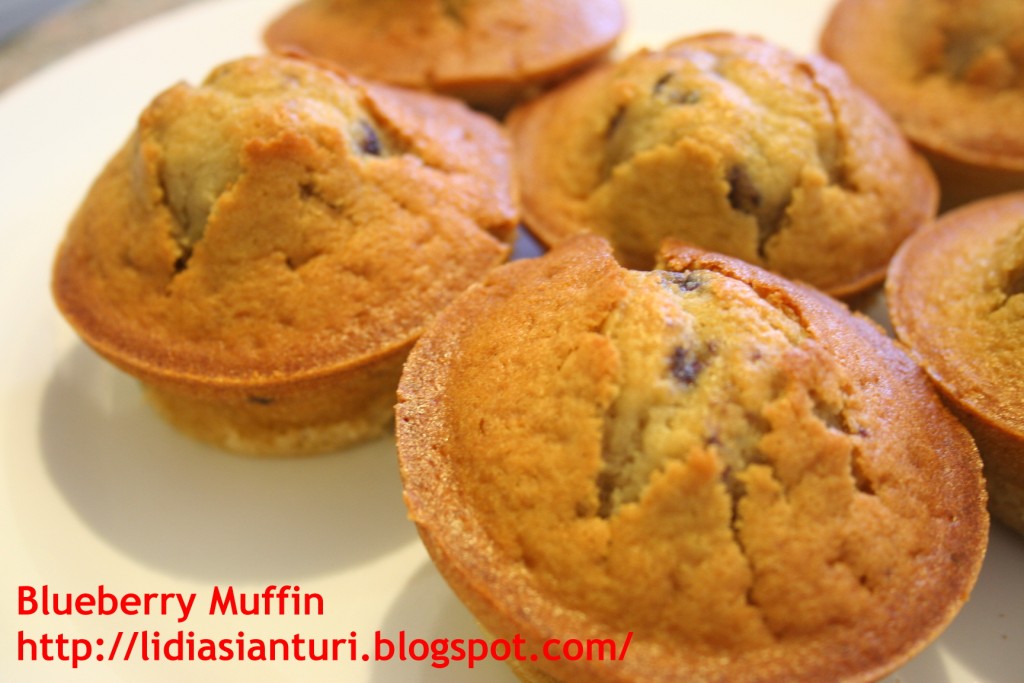
This time I would not share any recipe as I made these muffins from ready-mixed package sold in supermarket. I just added 2 eggs and 100ml of milk (in the instruction it should be just plain water, but I wanted it a bit creamy..so instead of plain water I added milk).
My husband loves it for breakfast...and my neighbour too...
So enjoy the pictures folks!

Bianca's and Jordan's Mom Copyright © 2009 Designed by Ipietoon Blogger Template for Bie Blogger Template Vector by DaPino