It is such a relieve to be able to sit in front of my computer and typing something for you..sharing this post is such a joyful moment.
I know it is long overdue..I've promised you all to share this tutorial couple months ago and kept forgetting to type it. So today is the day.. (while I have time to type).
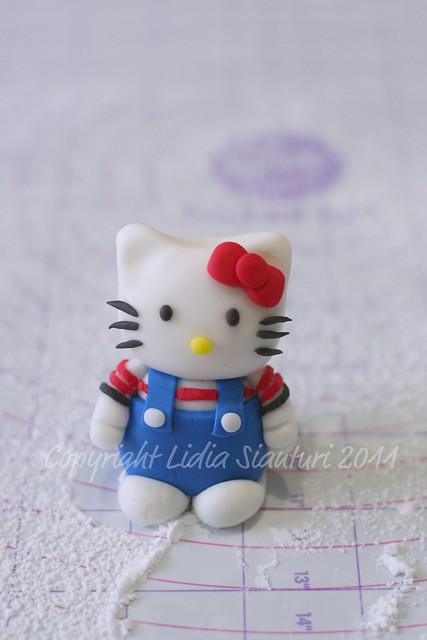
I made this Hello Kitty figurine for a girl birthday cake last year, so you will find the watermarks is in 2011. Let's start!
What you need:
- white rolled fondant, approximately 1.5 cup
- blue, red, yellow, black gel food coloring (I used gel coloring from Spiderman series by Wilton)
- sharp knife
- ball fondant tools
- small brush
- water
- powdered sugar
- mat
- toothpicks
- toothpicks
Always work on a powdered mat (using powdered sugar). Start to color small portion of the white fondant with blue, red, black and yellow coloring.
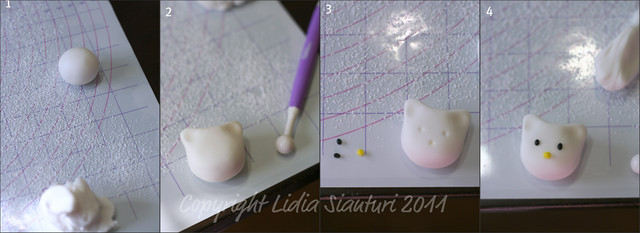
1. Make a ball for head from the white fondant.
2. Pinch the up left and right side of the ball using your finger to form ears, then by using the ball tools, mark the ear holes.
3. Form 2 small balls of black fondant, and one small ball of yellow fondant, using the back wooden side of a brush, mark three holes for eyes and nose.
4. With the help of the brush wet the holes and then stick the black balls in to the eyes holes and the yellow ball to the nose one.
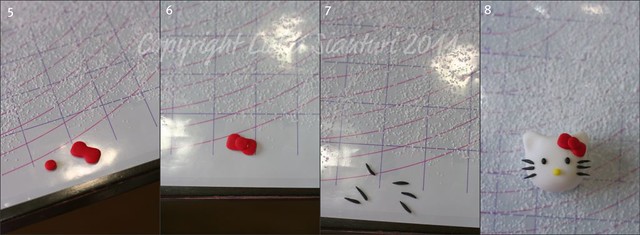
5. Make a flat round shape of red fondant and a tie-like shape one too.
6. Glue the round shape unto the tie shape with some water to form a bow.
7. Make six thin worm shape of black fondant.
8. Arrange the six worm shapes on the left and right cheeks as whiskers and the red bow on the head.
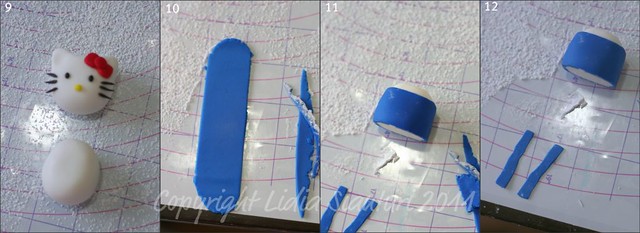
9. Make an oval ball of white fondant for the body.
10. Roll a sheet of blue fondant for the overall shirt.
11. Wrap around the oval ball of white fondant, glue it on with some water.
12. Make two strips of blue fondant .
10. Roll a sheet of blue fondant for the overall shirt.
11. Wrap around the oval ball of white fondant, glue it on with some water.
12. Make two strips of blue fondant .

13. Place and glue the blue strips on the shoulder to complete the overall shirt. And add 2 white buttons using round flat shape of white fondant.
14. Make two hands as shown (it is simply made from an oval shape and then flatten and grit with a knife for fingers).
15. Make two feet as shown (simply made from an oval shape and then pinch the rear part with point finger.
16. Place and glue the hands, and then glue the head on the body (use a toothpick as necessary).
16. Place and glue the hands, and then glue the head on the body (use a toothpick as necessary).
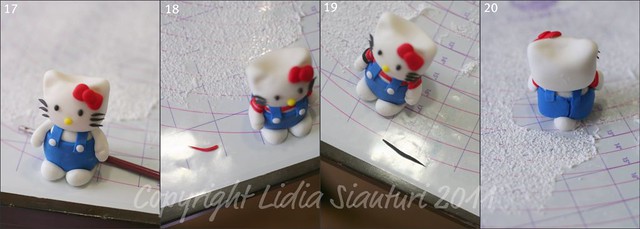
17. Place and glue the feed and support the bottom rear body with a wooden part of a brush (this is a place for tail later).
18. Prepare 8 very thin worm shape of red fondant, and glue them on the body to give accent as stripy shirt (two for each arms, and 3 on the chest and 3 on the back, see a bigger picture below).
19. Prepare 2 very thin worm shape of black fondant and glue them on both arms.
20. Make a small ball of white fondant and glue them as a tail.
And tadda...final product! Hope it is clear enough and happy practicing!