


What you need:
Some rolled fondant, colored as prefer
Sharp knife
A ziploc
Veining tool

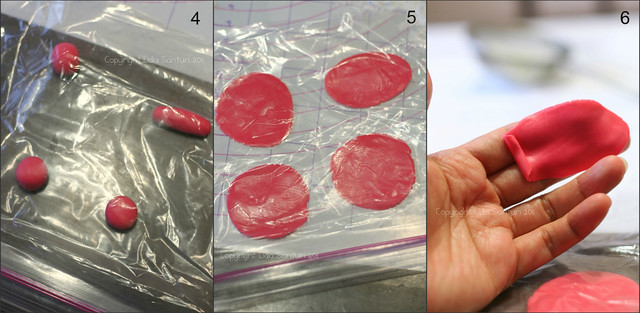
4: place them inside a ziploc.
1: roll a long cylinder as shown on the picture
2: make 4 same size cuts
3: roll the first three into round balls and the last one into a cylinder
4: place them inside a ziploc.
5: flatten each of them using your thumb.
6: Take out the cylinder one and roll it from one side.
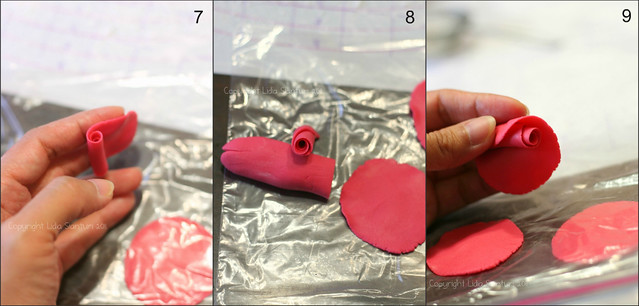
7: continue to roll to the other side
8: The result will look like "stigma"
9: Take one of the flatten round shape, and wrap around the "stigma".
10: Take the second flatten round shape and place it overlap to the first one.
11: Do the same thing as for the last round shape.
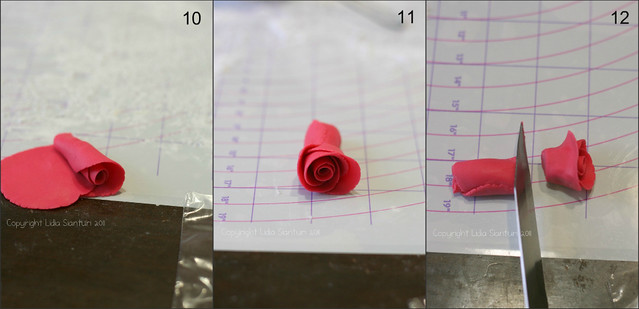
12: Cut off the unwanted bottom part.
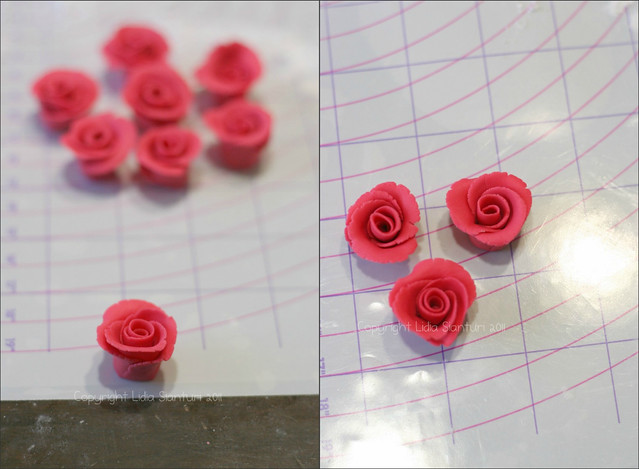
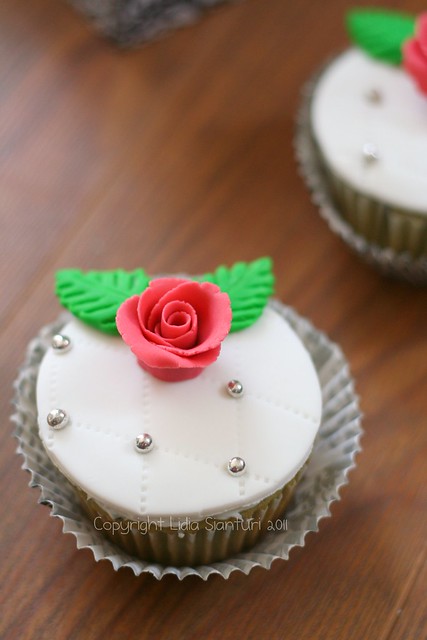
And here is the result....
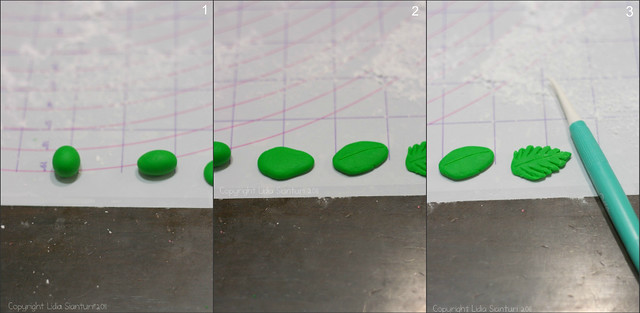
Now to make the leaf.
1: Make round shape of green colored fondant, then rolled it on palm of hand to form an oval.
2: Flatten the oval, make adjustment of the leaf shape using your finger as needed. Then mark the long centre part using veining tool.
3: Mark the margin with veining tool as shown on the picture.
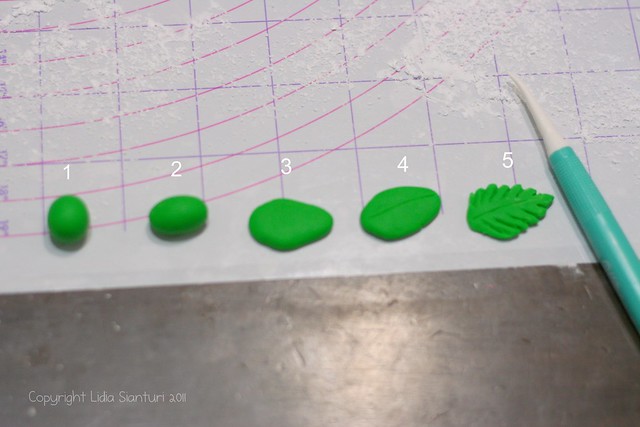
Here is a complete picture of the process of making the leaf.
Simple isn't it? Now is your turn to try...Keep practicing!

4 comments:
ayu banget liddd dadi pengen nggawe jg...tp aku gak seneng mangane ik...
ya kan ono si mbak Rit...hehehe
beautiful
@Bayu: suwun...
Post a Comment